Quickstart
Old Version
This page is about Kubeflow Pipelines V1, please see the V2 documentation for the latest information.
Note, while the V2 backend is able to run pipelines submitted by the V1 SDK, we strongly recommend migrating to the V2 SDK.
For reference, the final release of the V1 SDK was kfp==1.8.22, and its reference documentation is available here.
Use this guide if you want to get an introduction to the Kubeflow Piplines user interface (UI) and get a simple pipeline running quickly.
The goal with this quickstart guide is to shows how to use two of the samples that come with the Kubeflow Pipelines installation and are visible on the Kubeflow Pipelines UI. You can use this guide as an introduction to the Kubeflow Pipelines UI.
Deploy Kubeflow and open the Kubeflow Pipelines UI
There are several options to deploy Kubeflow Pipelines, follow the option that best suits your needs. If you are uncertain and just want to try out kubeflow pipelines it is recommended to start with the standalone deployment.
Once you have deployed Kubeflow Pipelines, make sure you can access the UI. The steps to access the UI vary based on the method you used to deploy Kubeflow Pipelines.
Run a basic pipeline
Kubeflow Pipelines offers a few samples that you can use to try out Kubeflow Pipelines quickly. The steps below show you how to run a basic sample that includes some Python operations, but doesn’t include a machine learning (ML) workload:
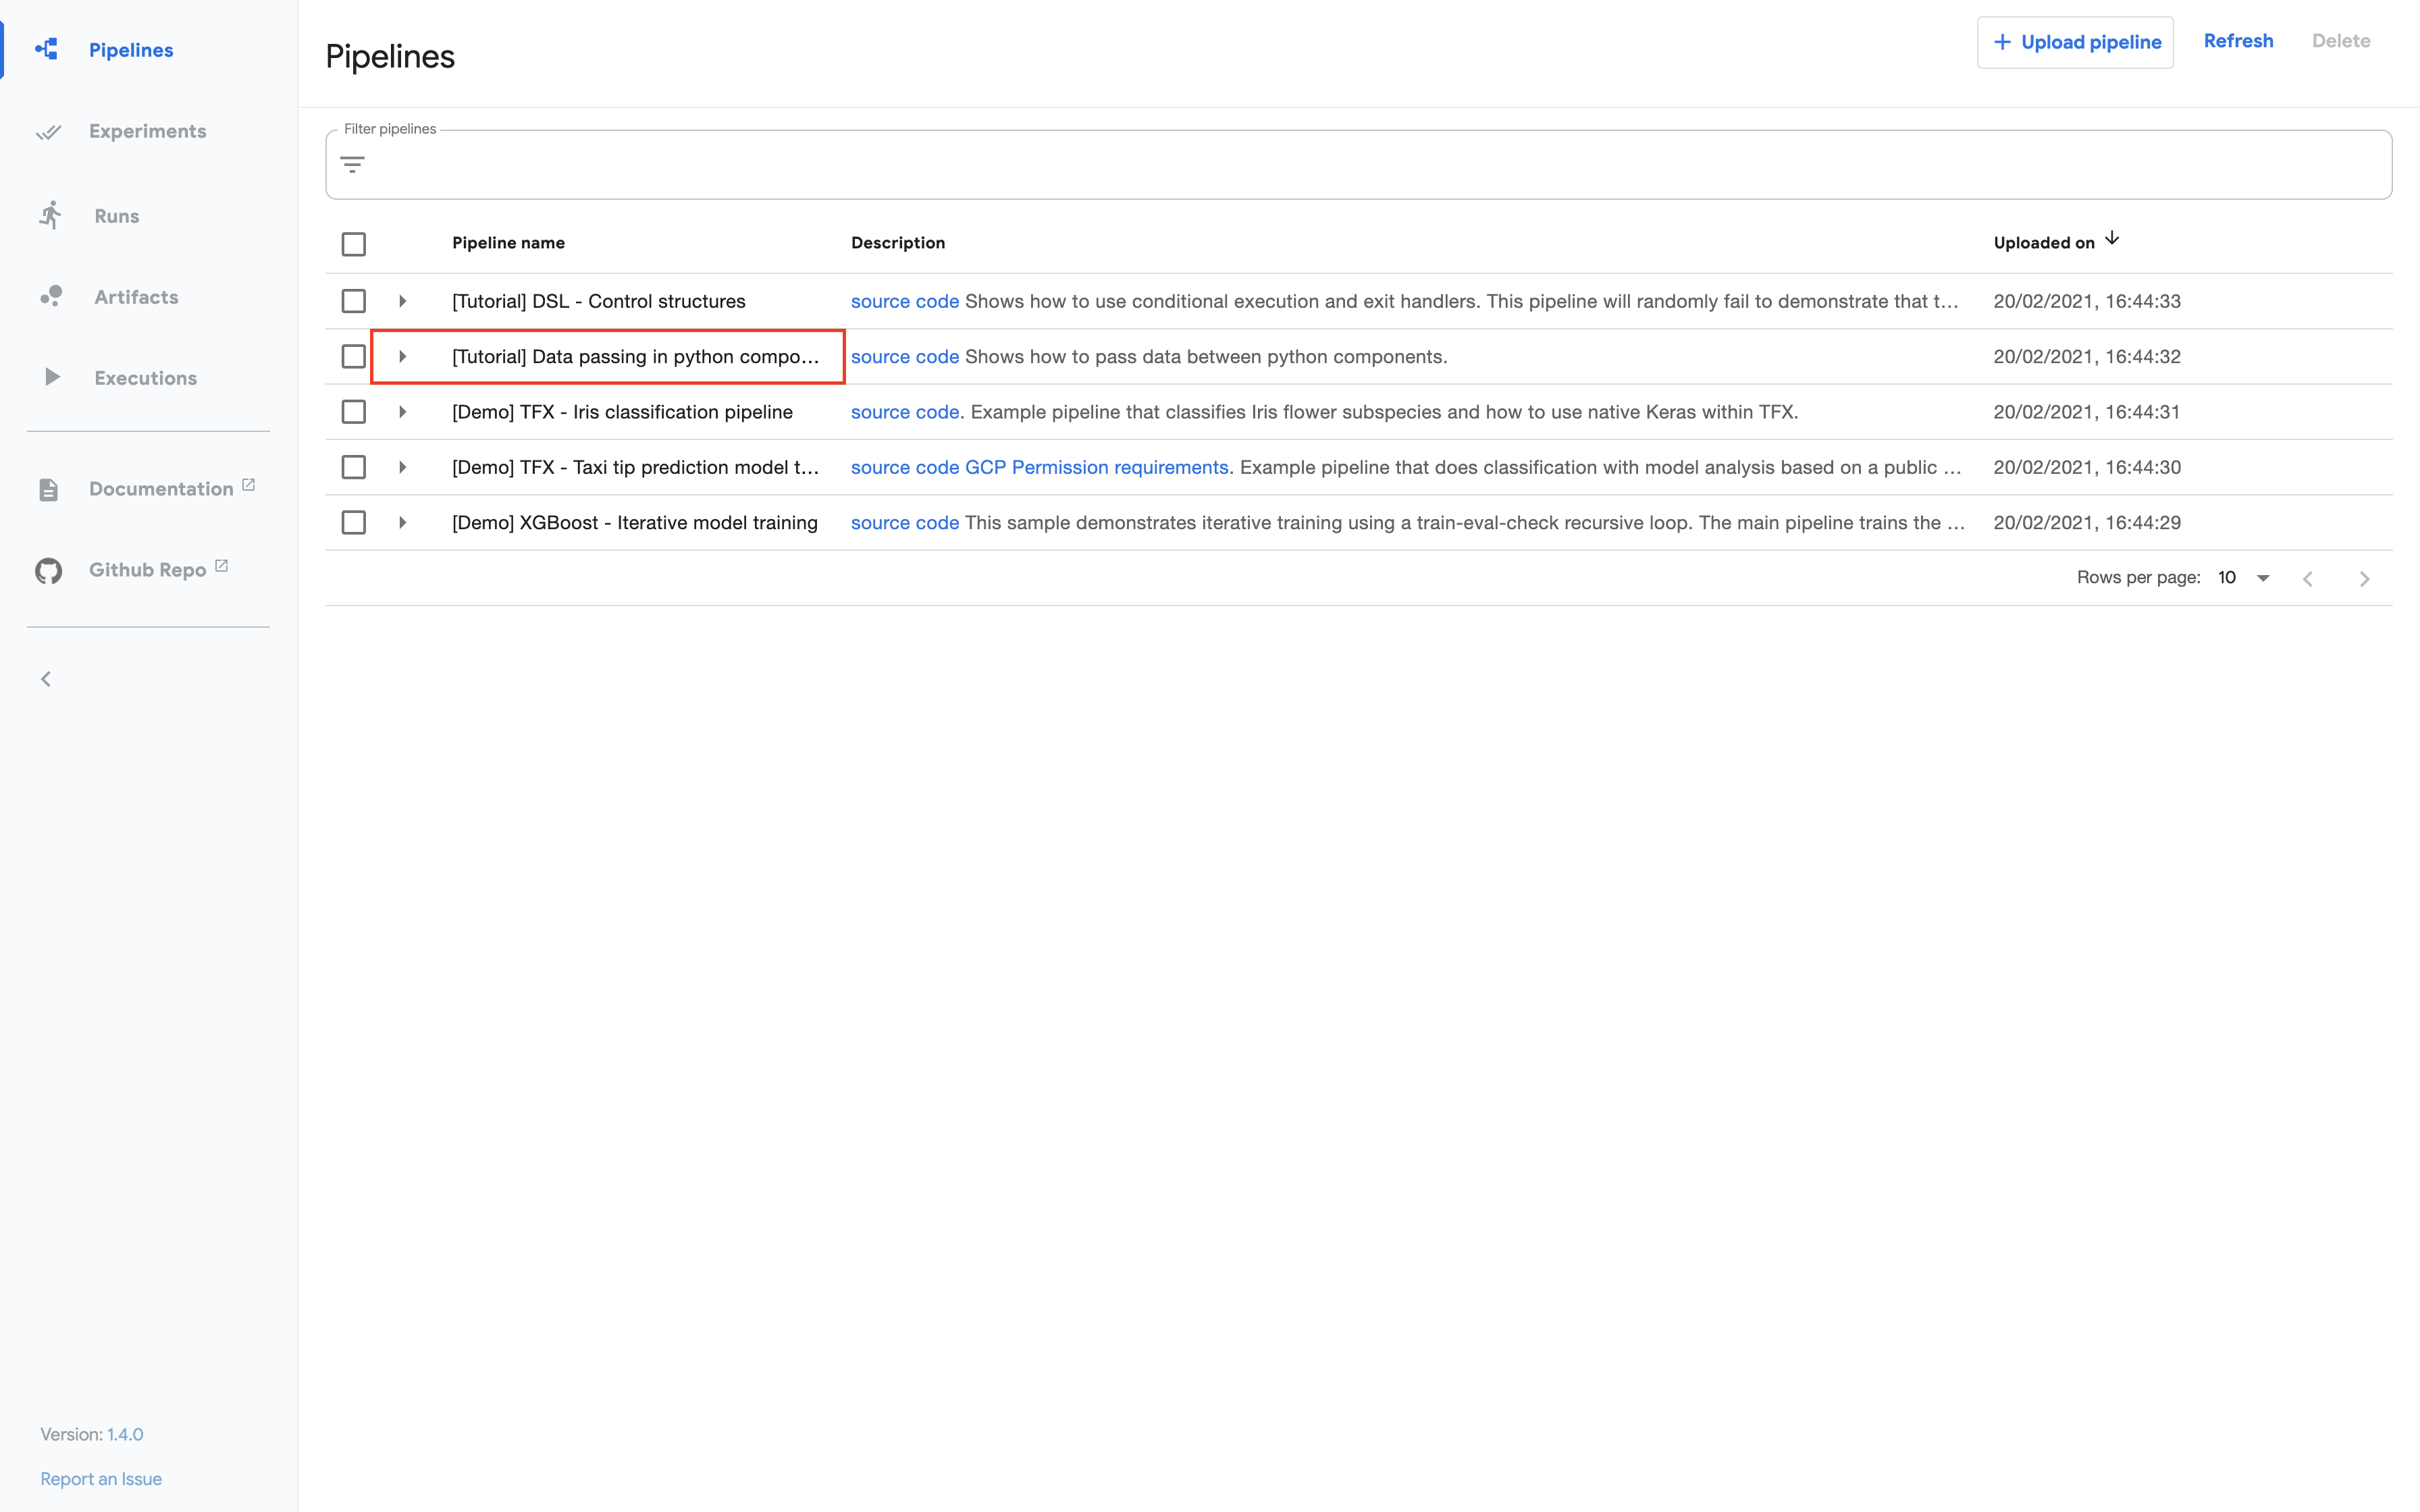
Click the name of the sample, [Tutorial] Data passing in python components, on the pipelines UI:
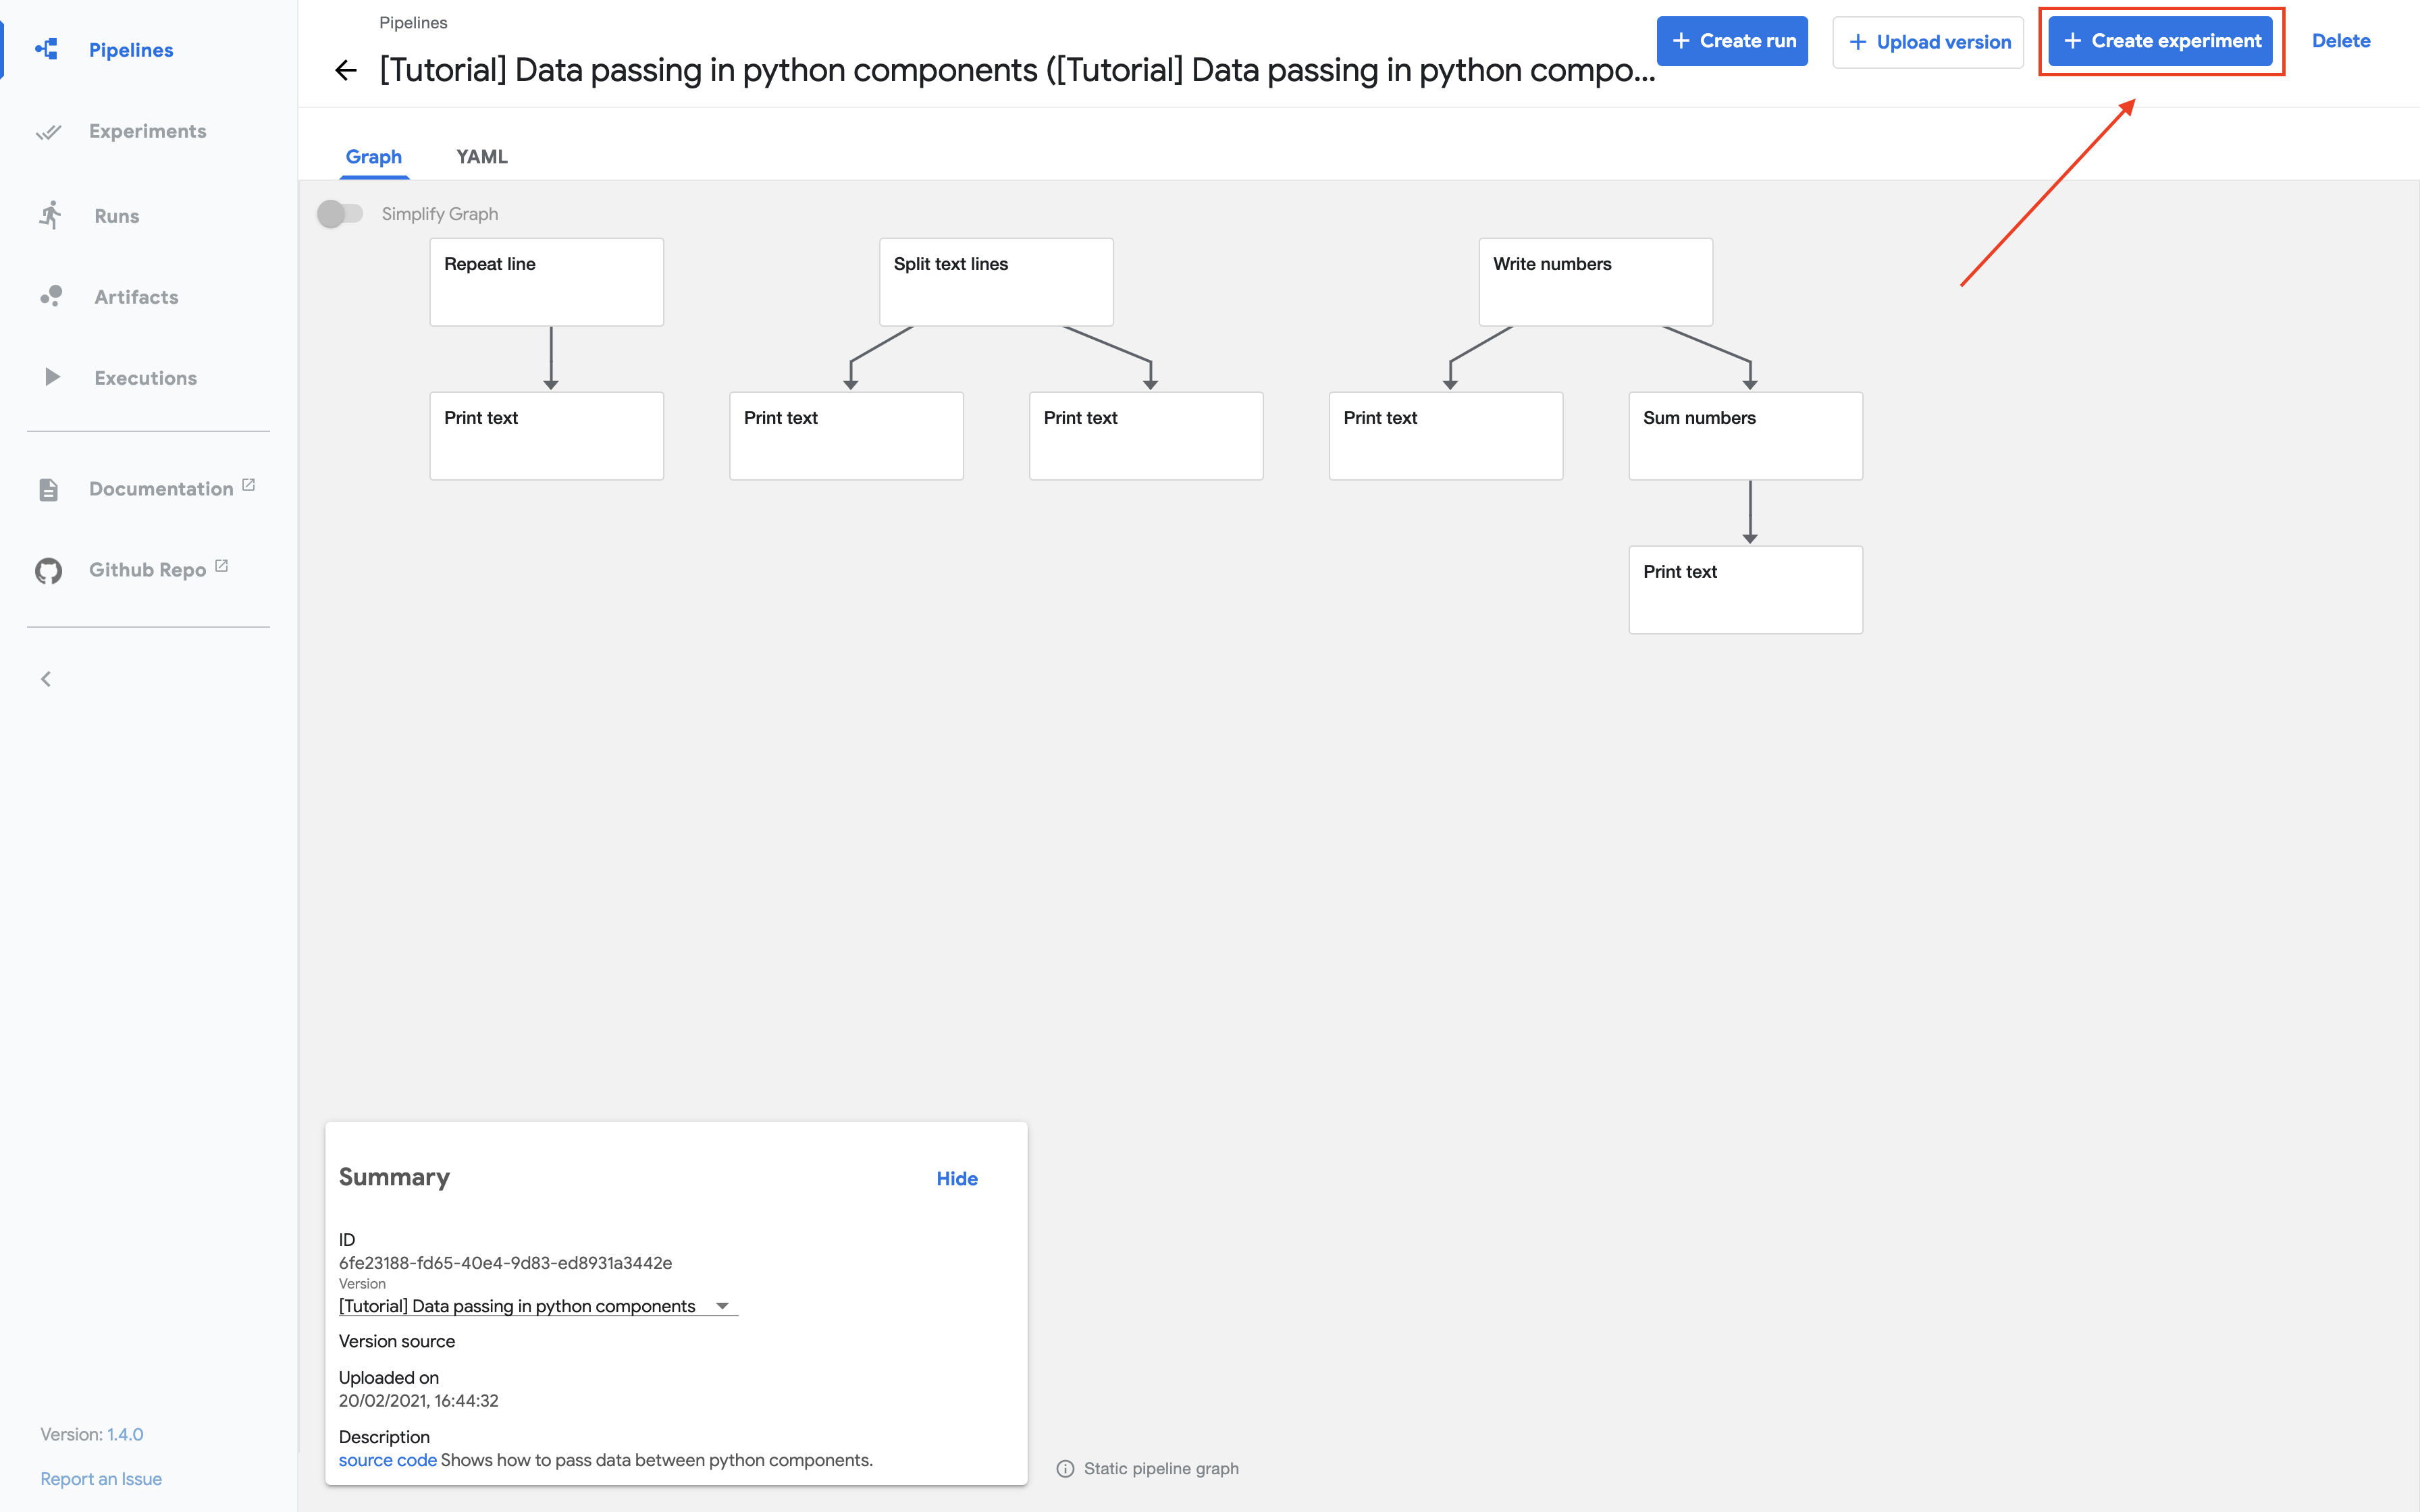
Click Create experiment:
Follow the prompts to create an experiment and then create a run. The sample supplies default values for all the parameters you need. The following screenshot assumes you’ve already created an experiment named My experiment and are now creating a run named My first run:
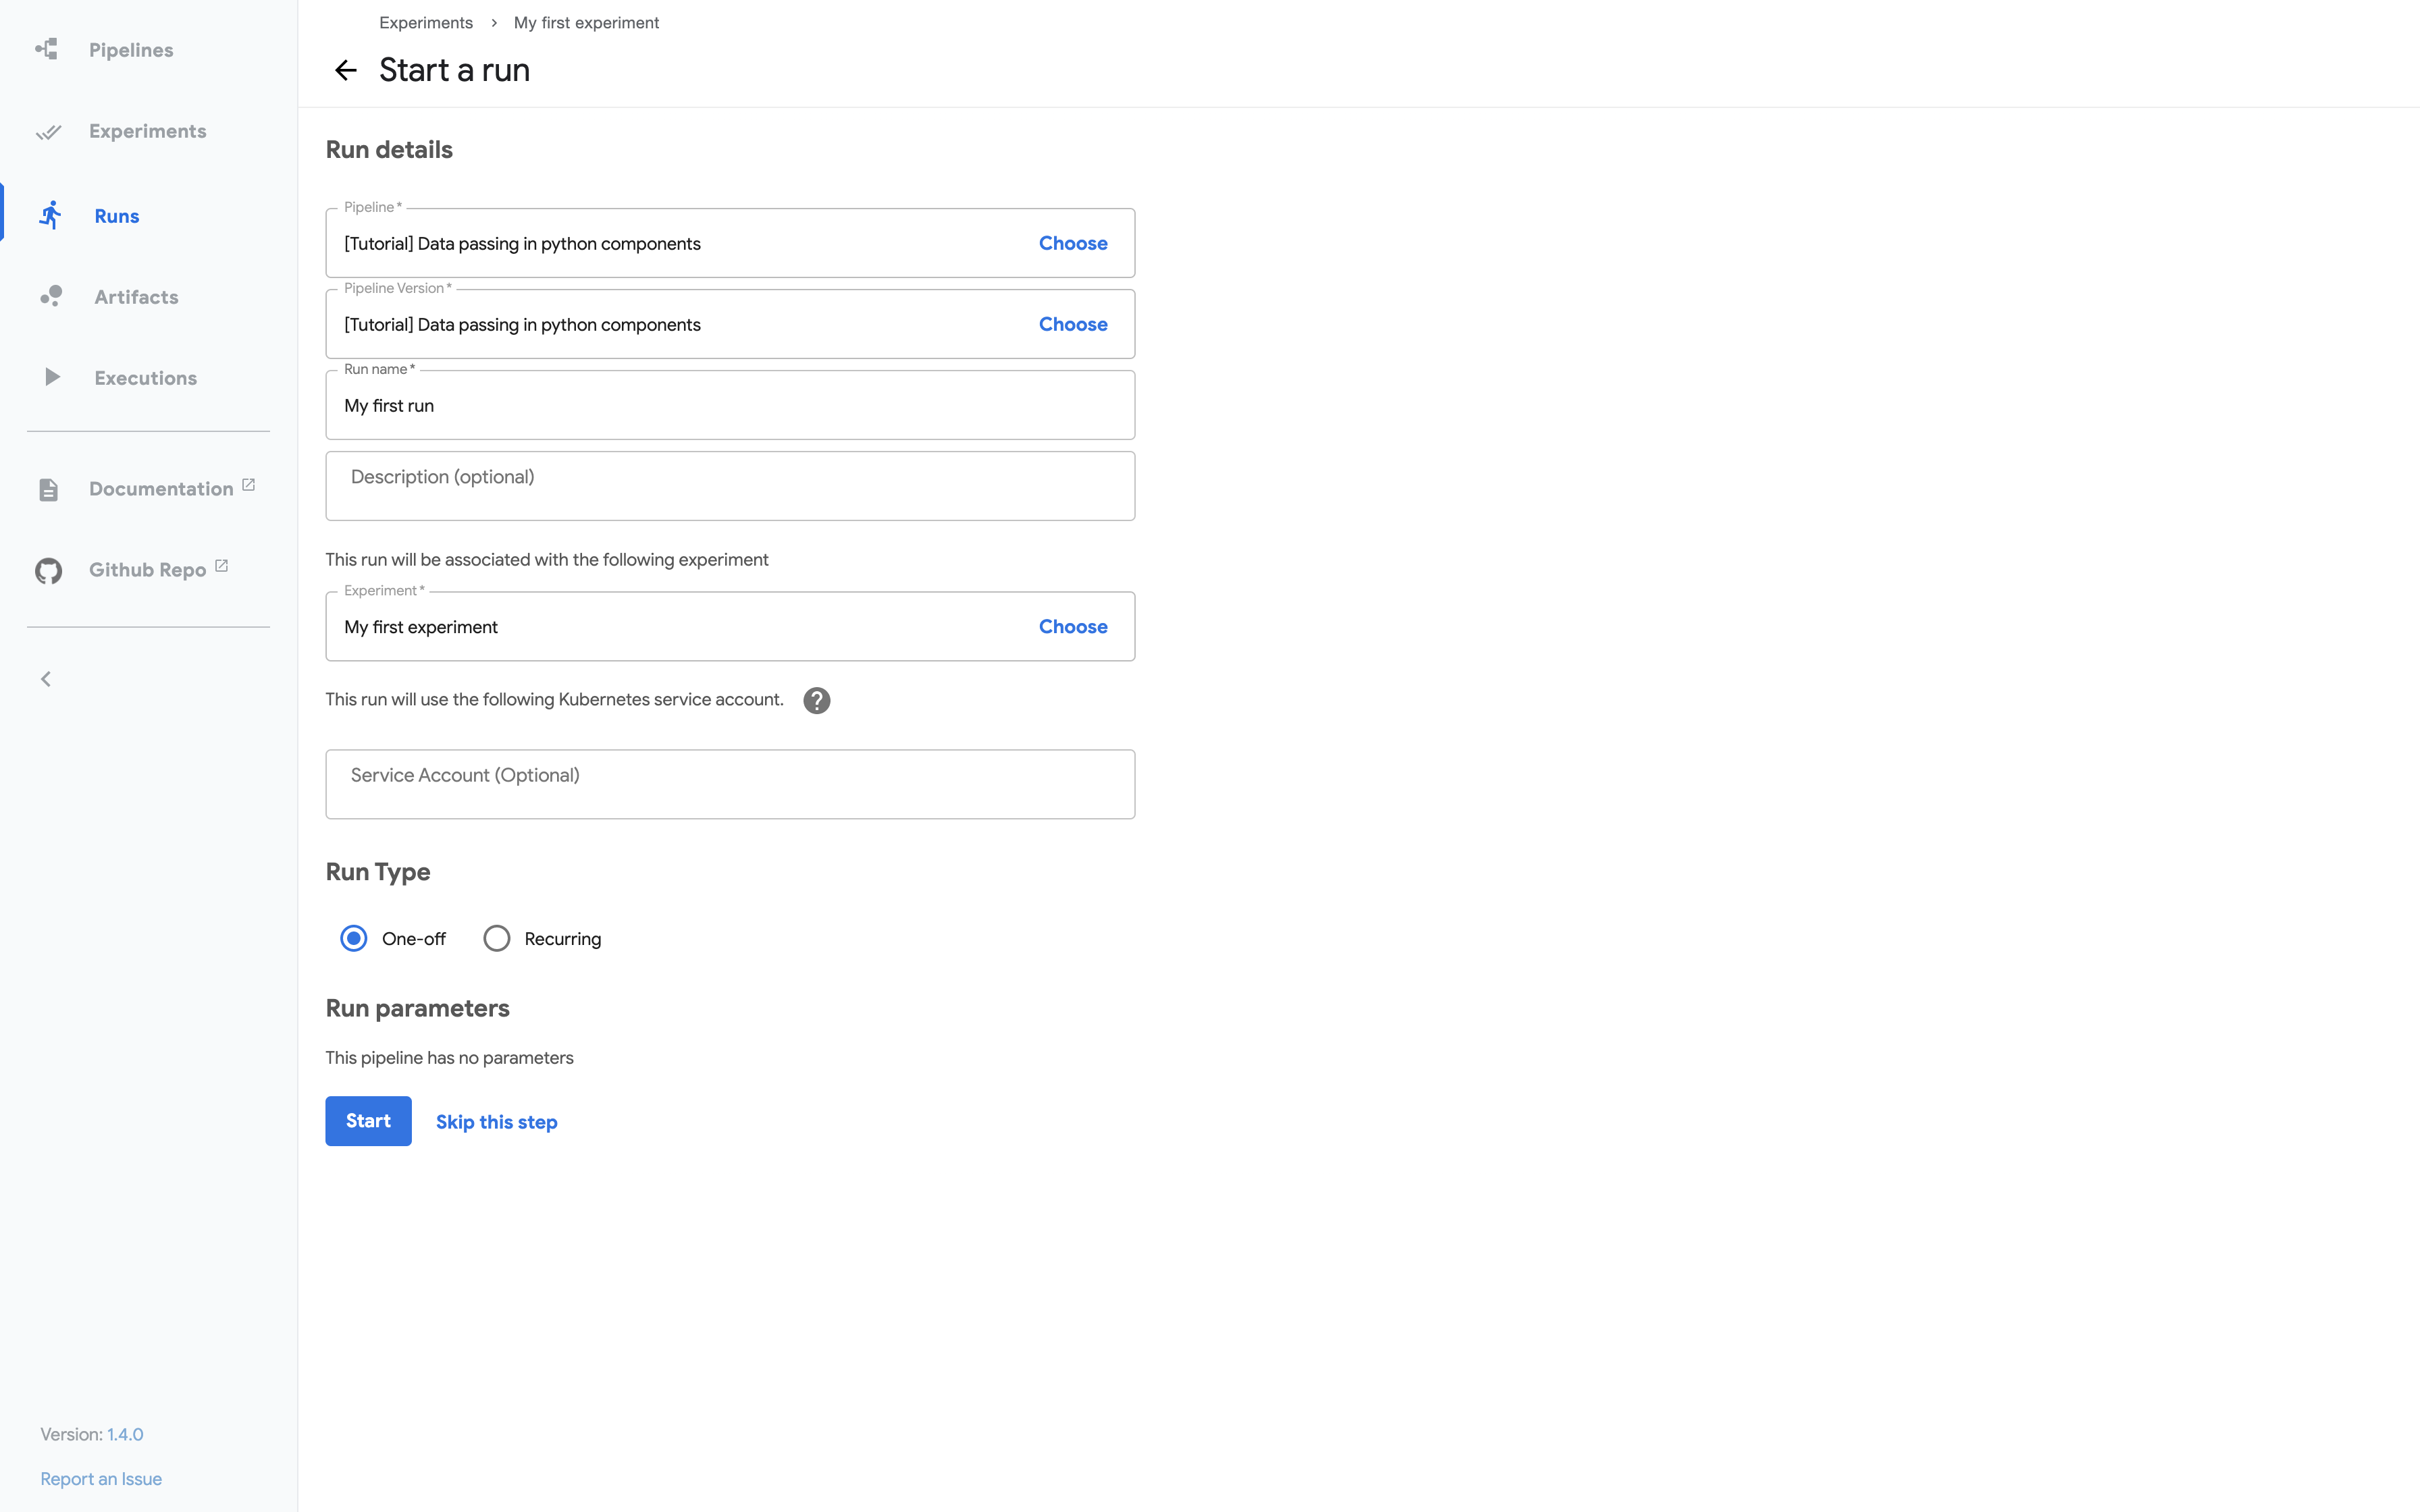
Click Start to run the pipeline.
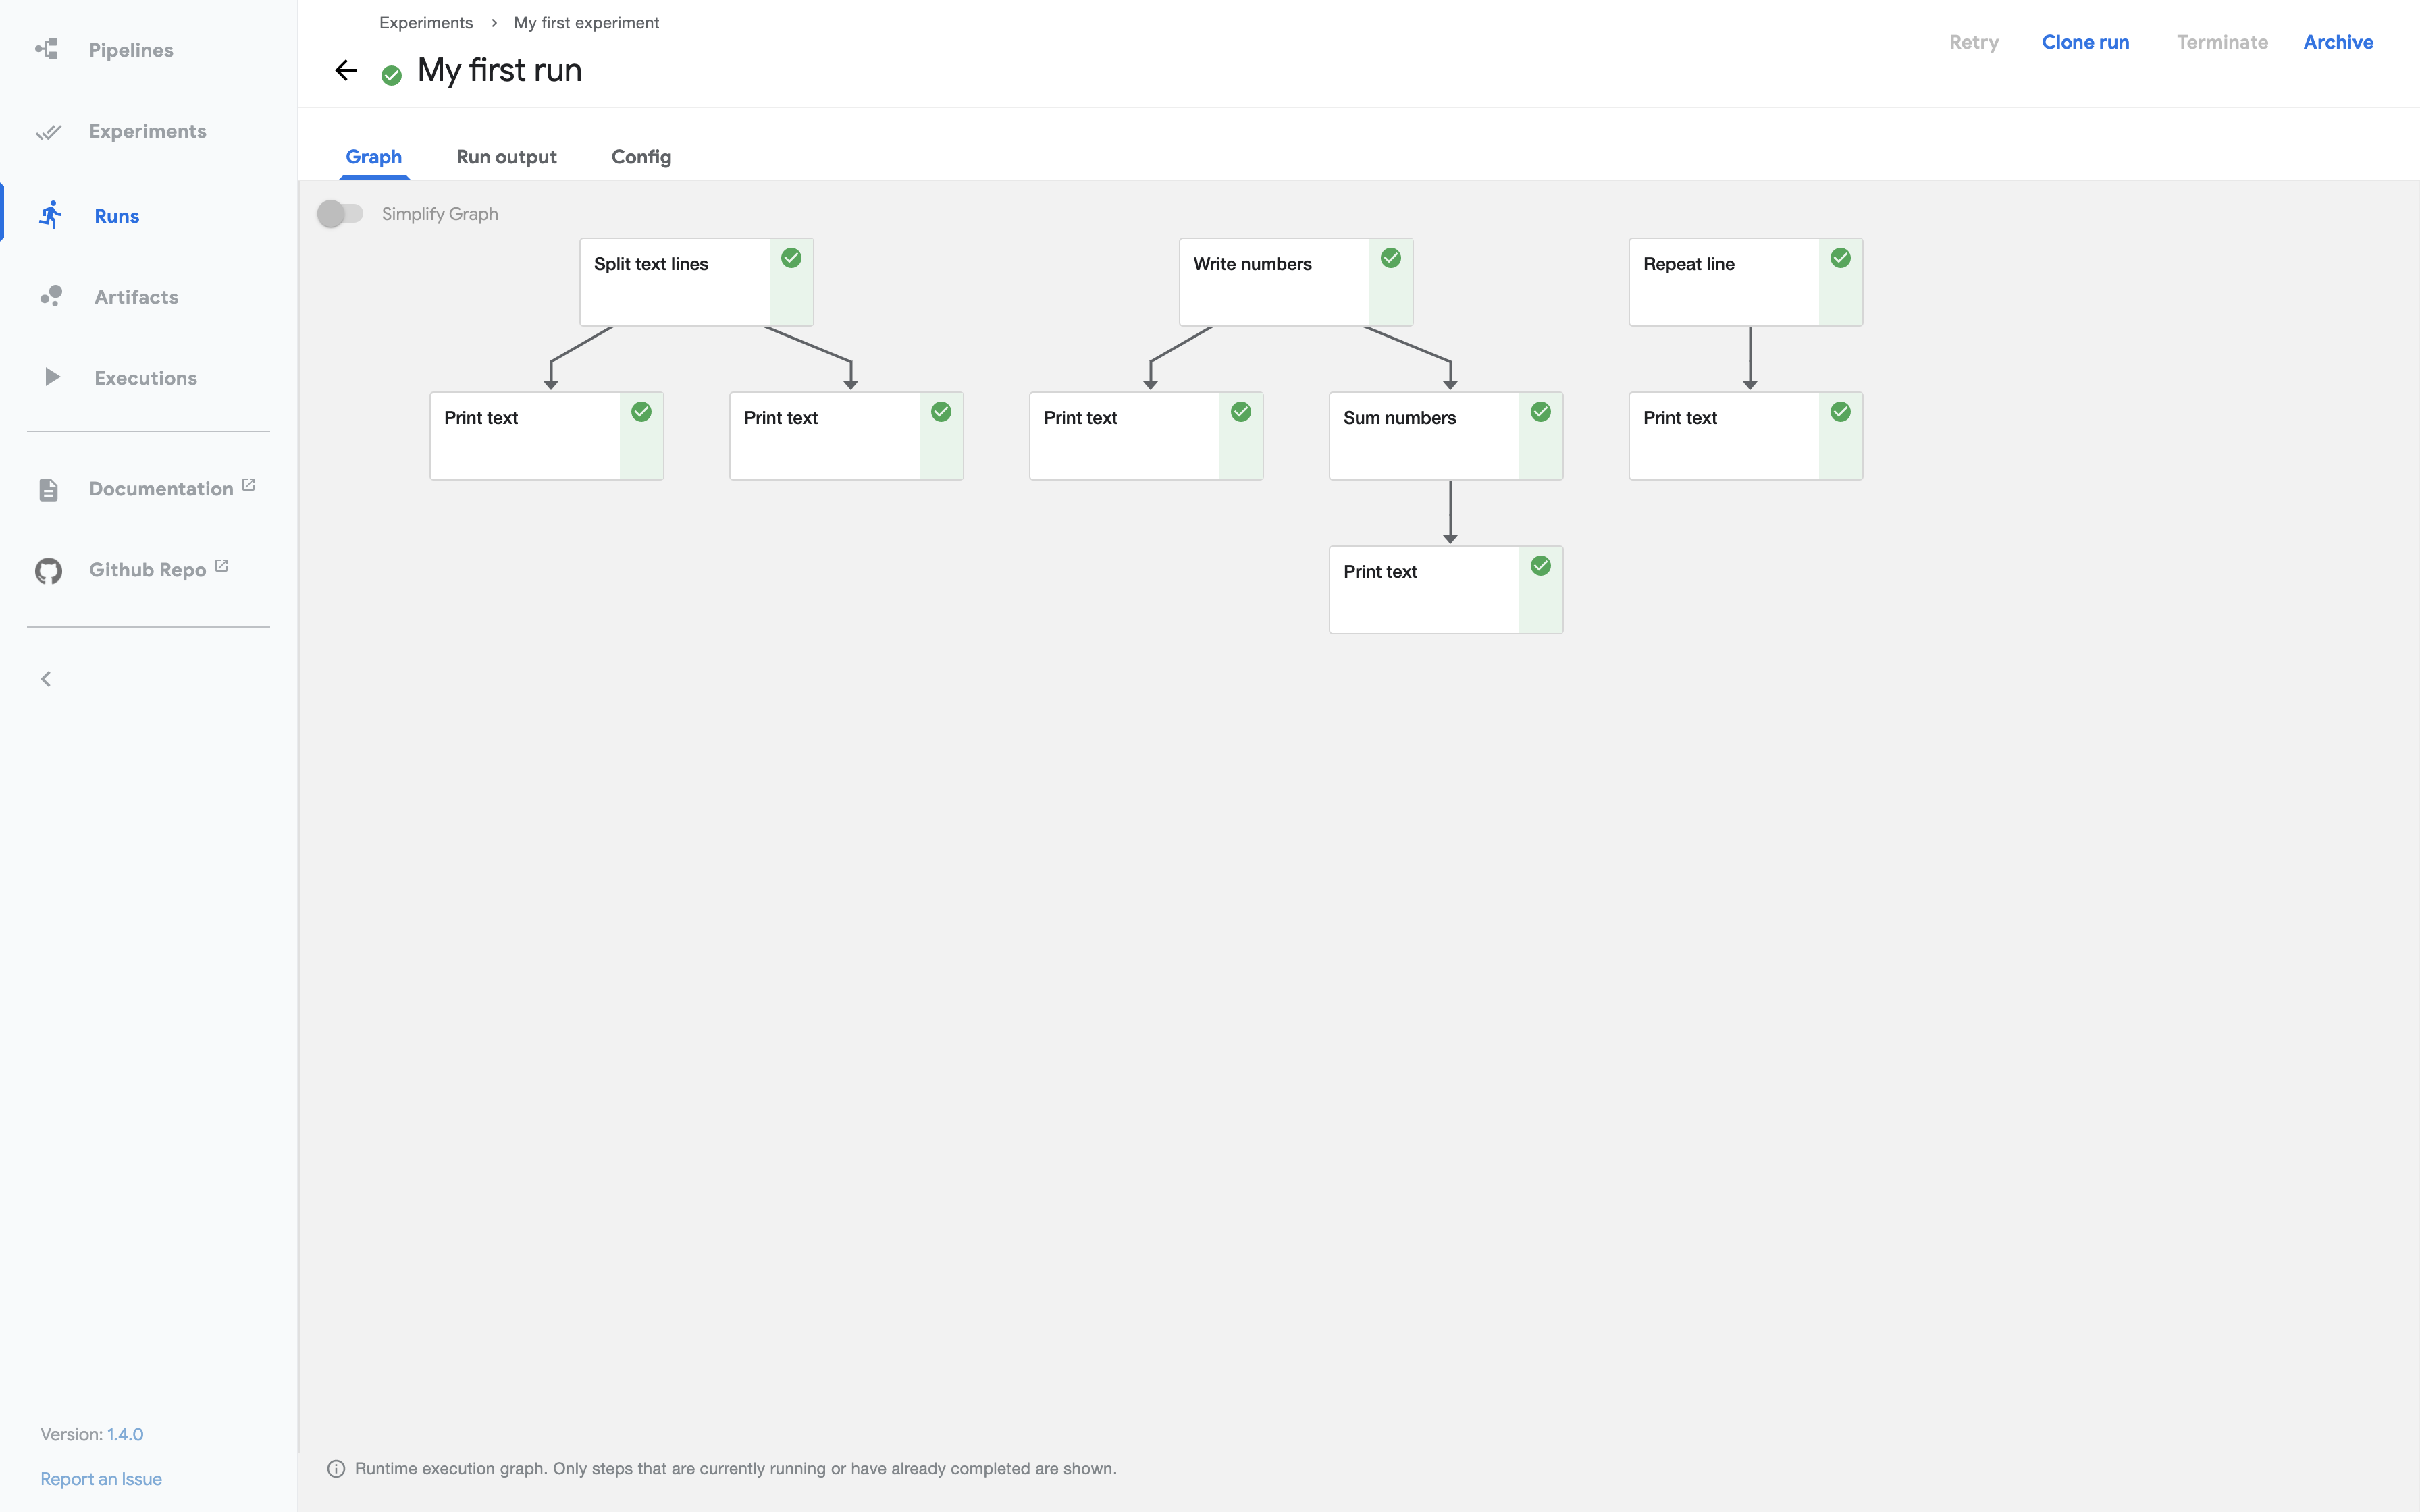
Click the name of the run on the experiments dashboard:
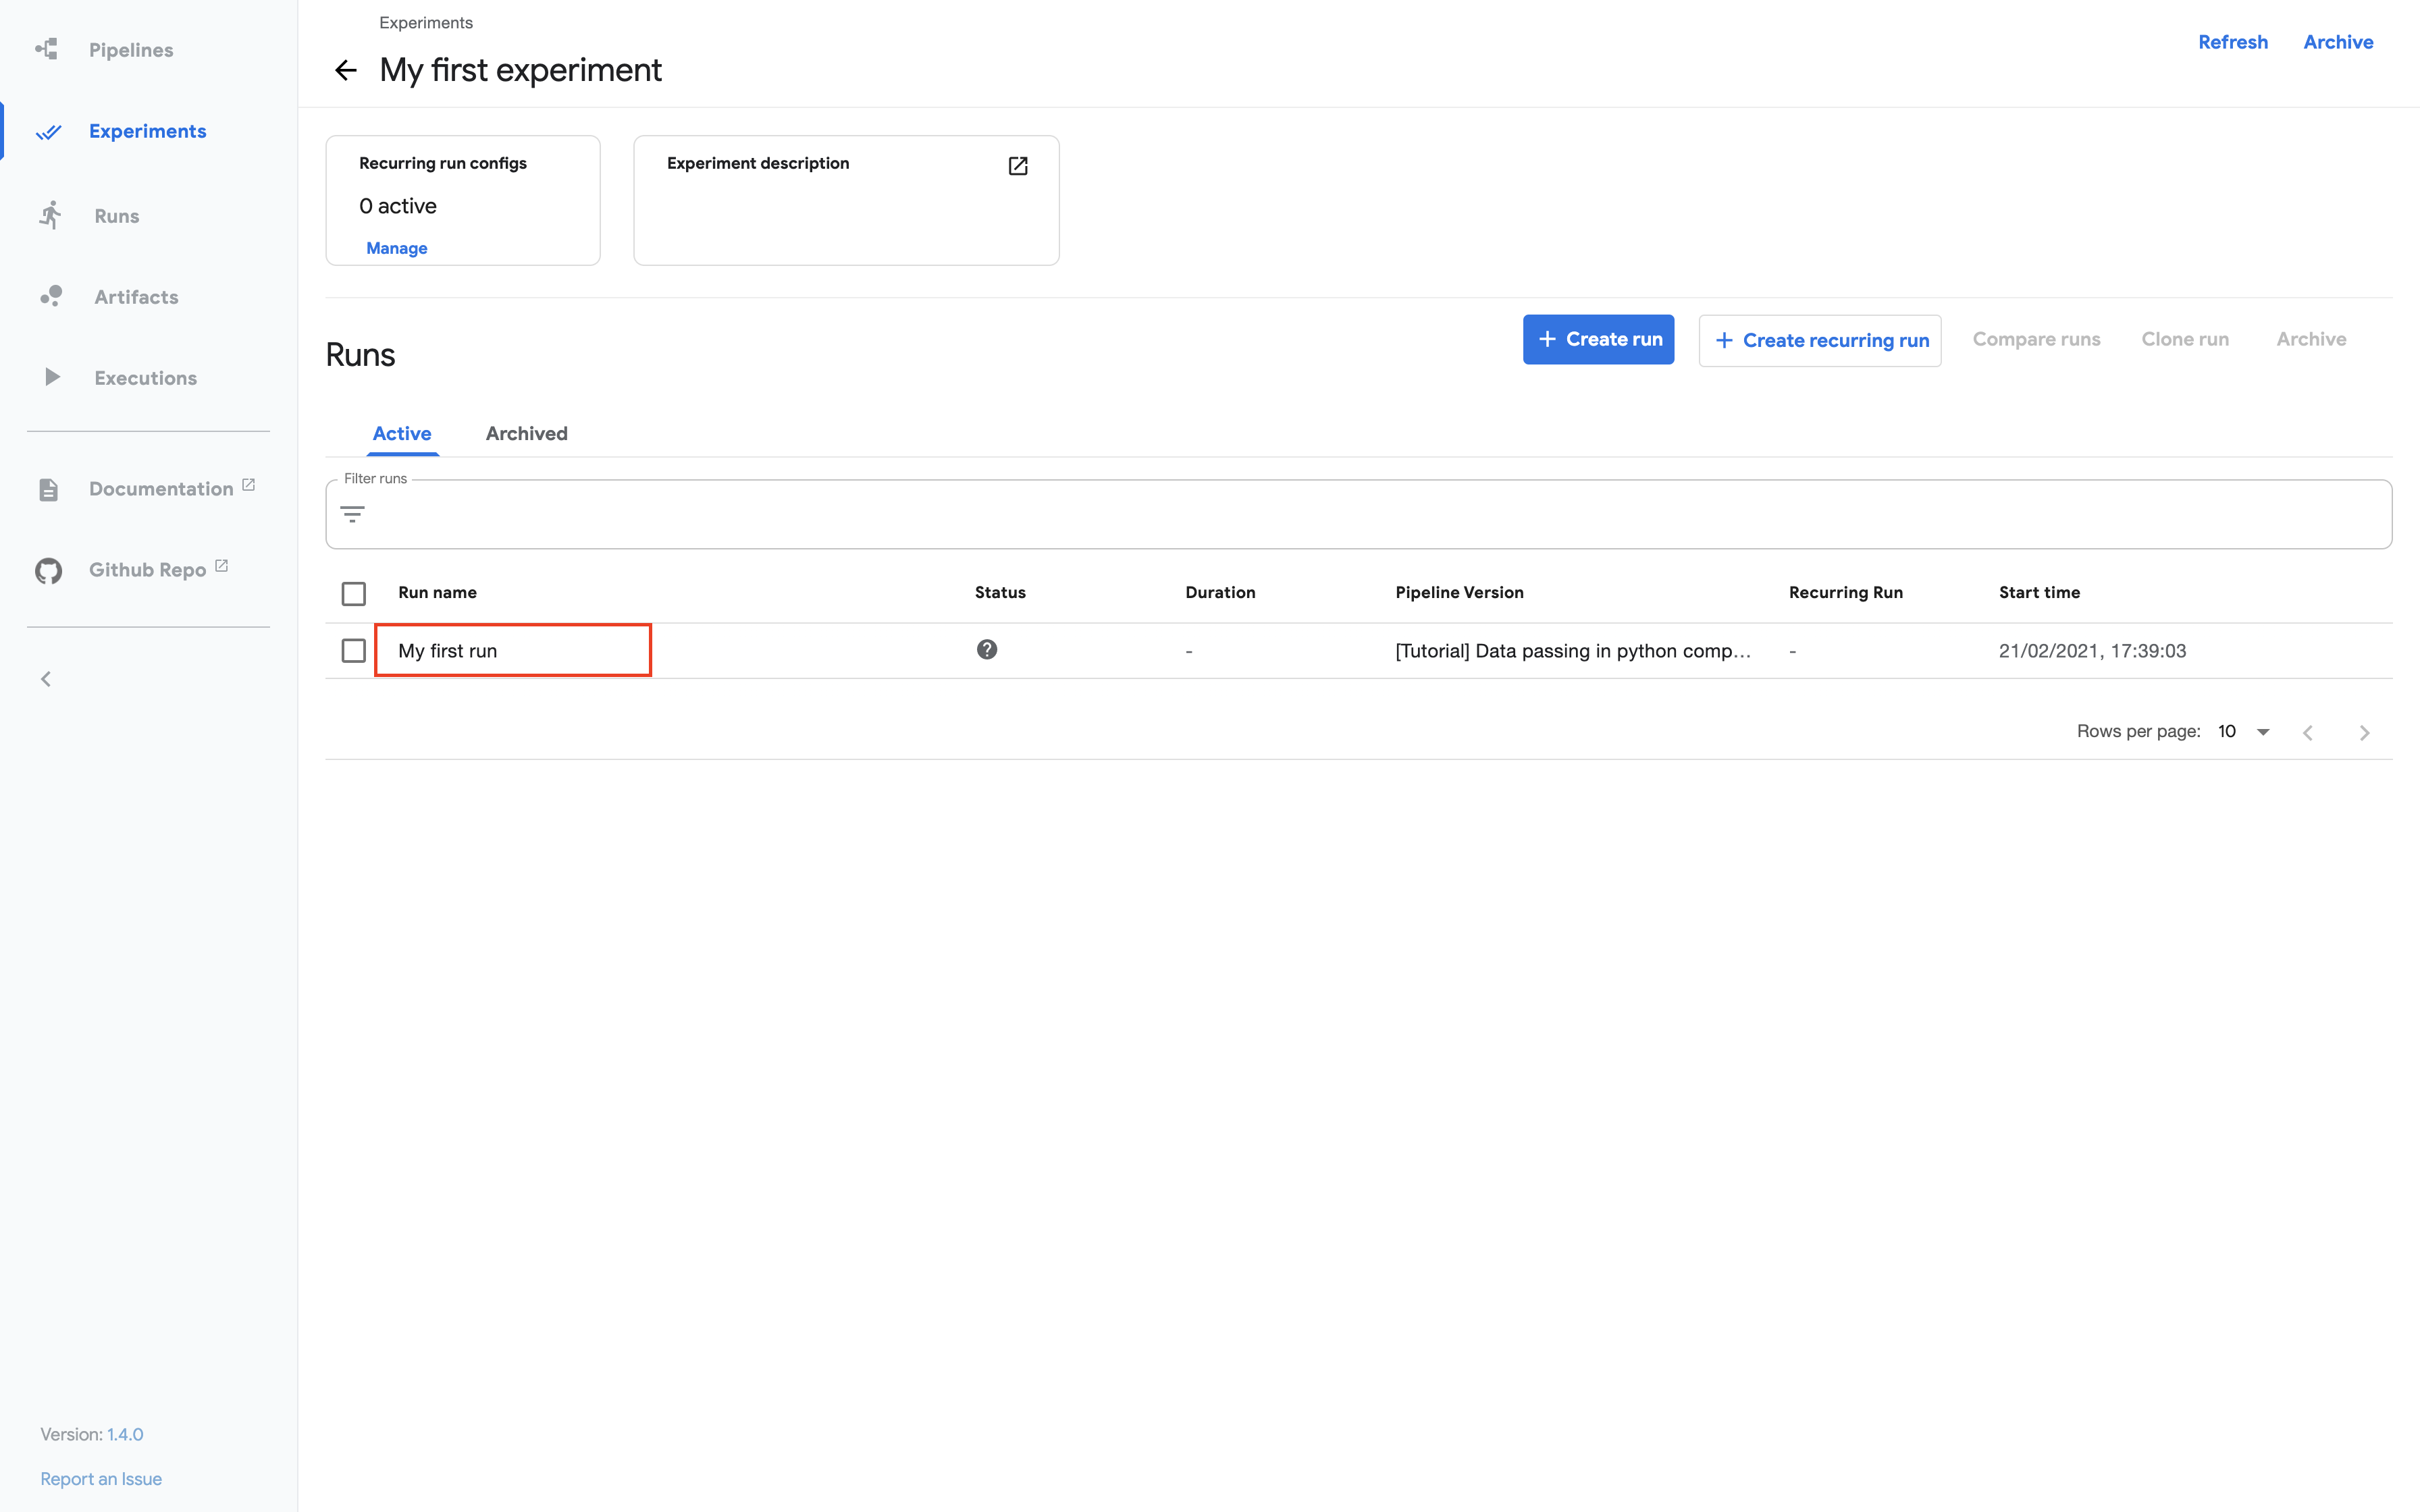
Explore the graph and other aspects of your run by clicking on the components of the graph and the other UI elements:
You can find the source code for the Data passing in python components tutorial in the Kubeflow Pipelines repo.
Run an ML pipeline
This section shows you how to run the XGBoost sample available from the pipelines UI. Unlike the basic sample described above, the XGBoost sample does include ML components.
Follow these steps to run the sample:
Click the name of the sample, [Demo] XGBoost - Iterative model training, on the pipelines UI:
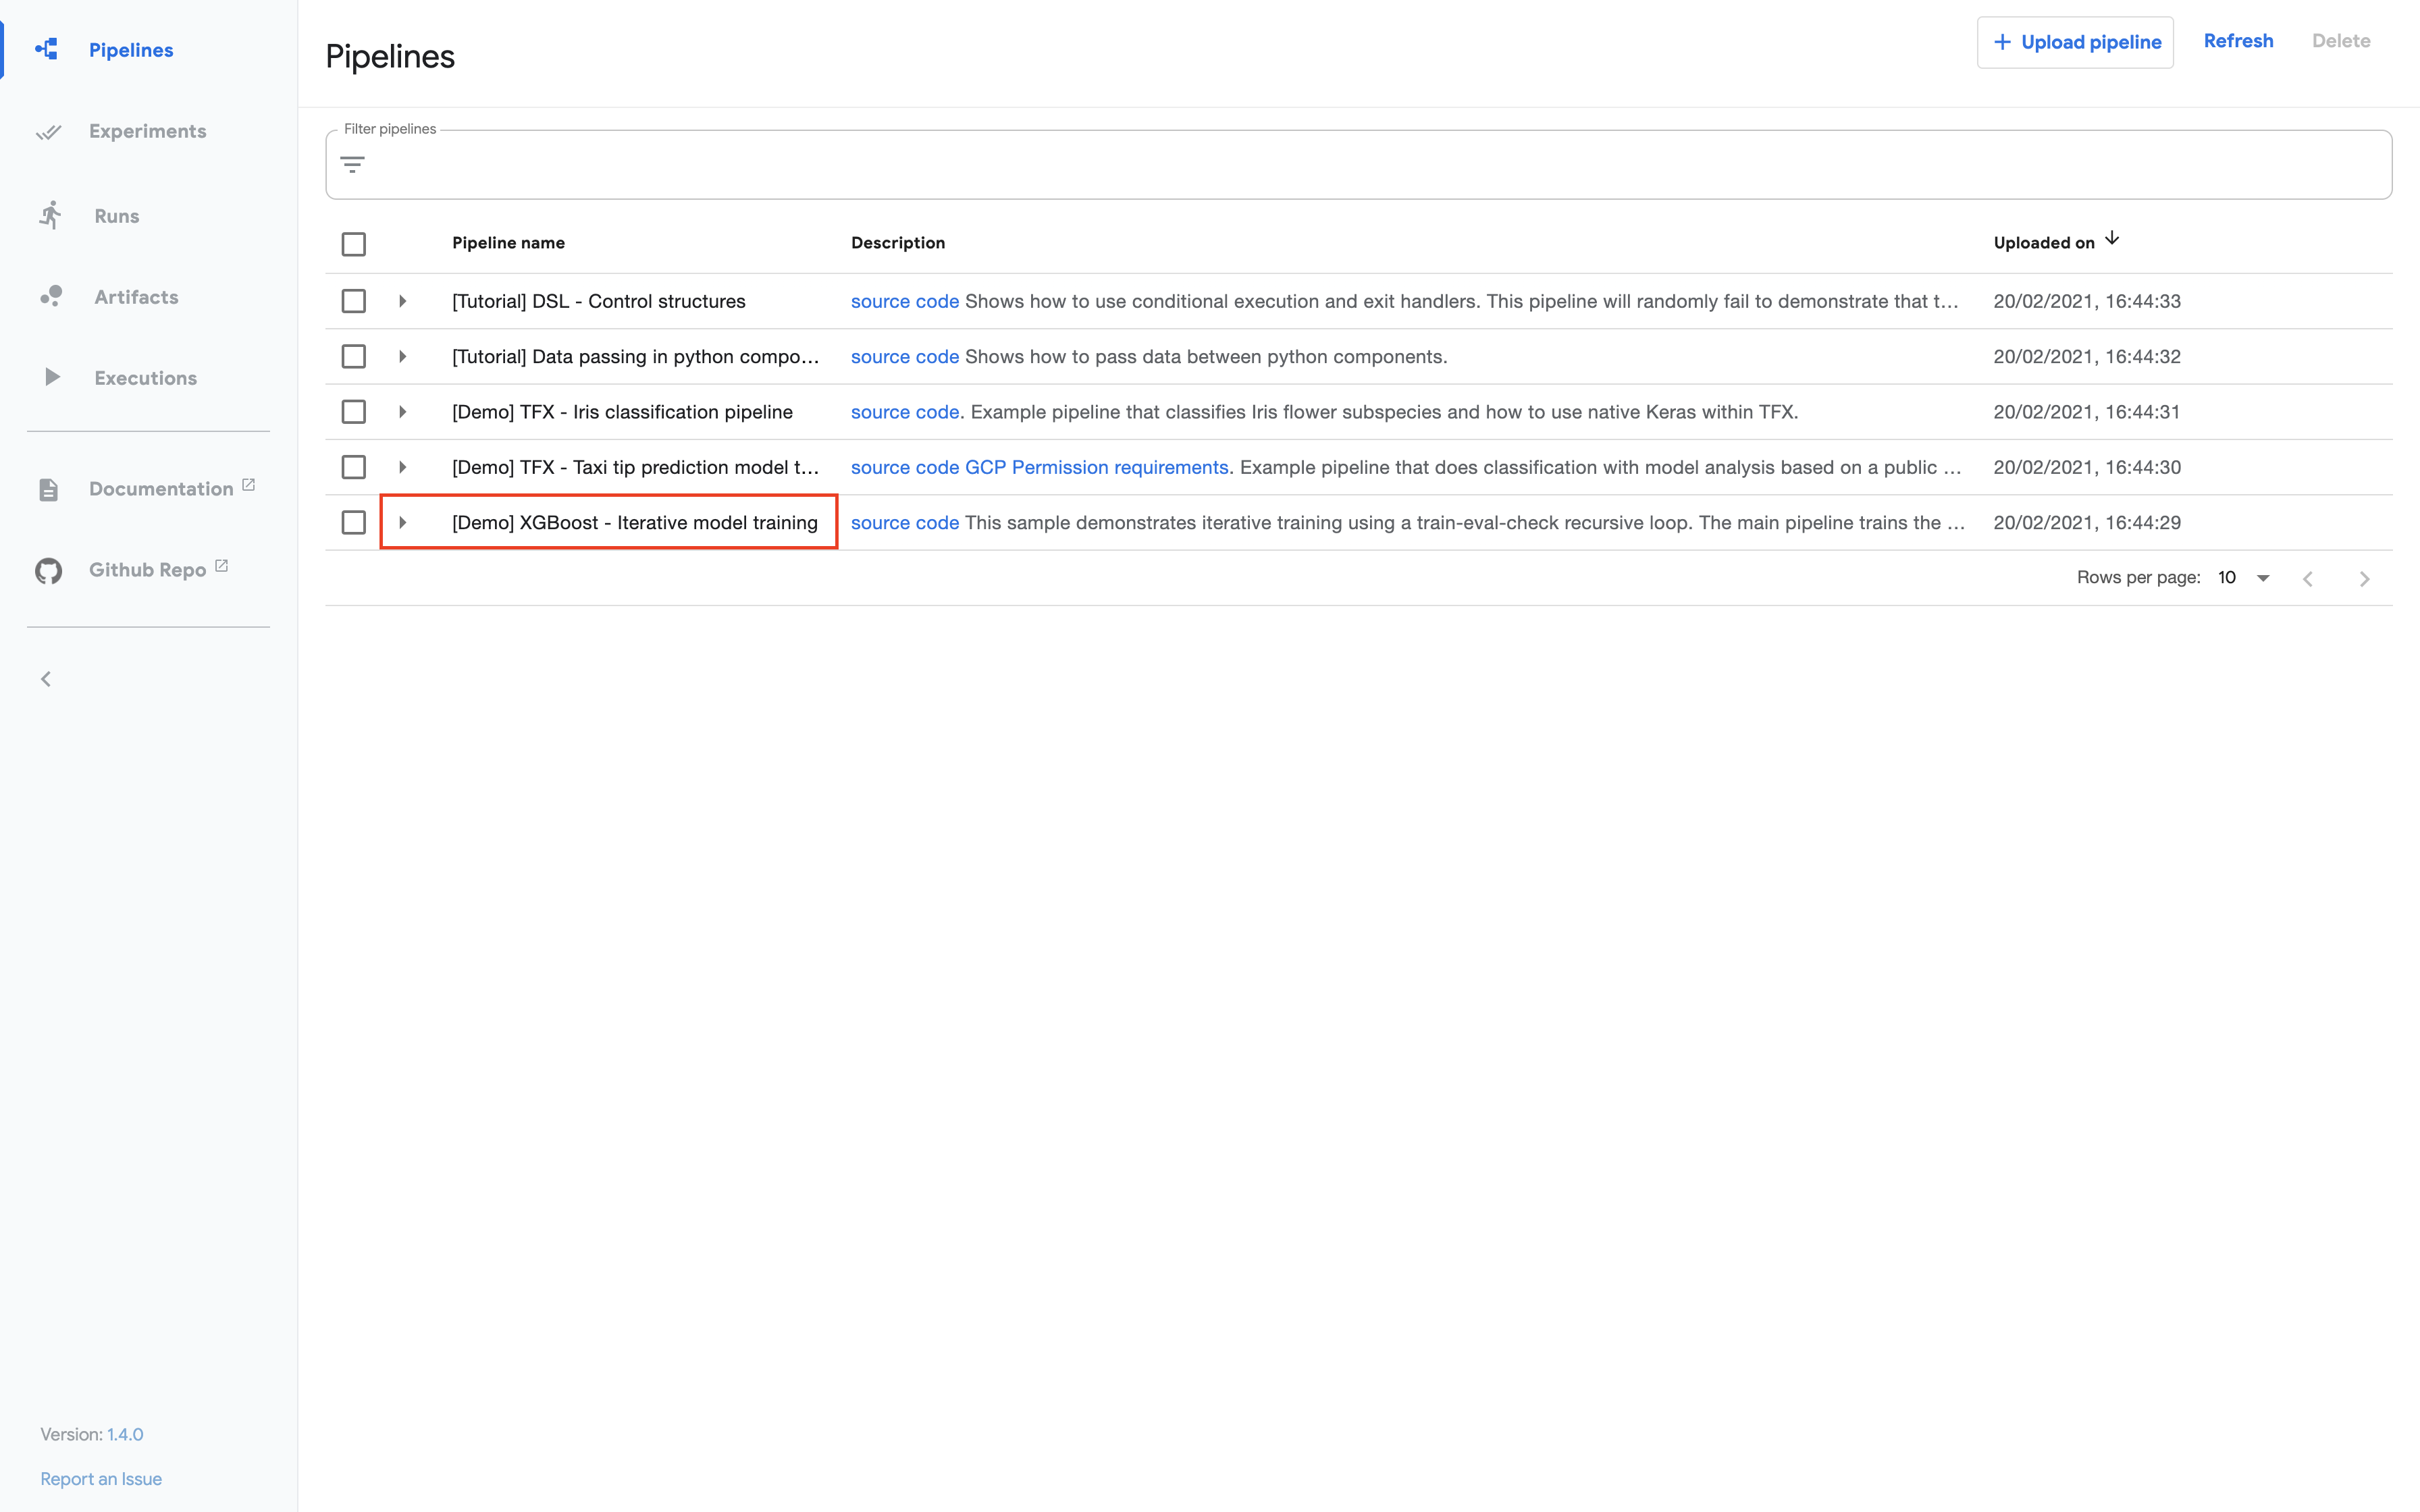
Click Create experiment.
Follow the prompts to create an experiment and then create a run.
The following screenshot shows the run details:
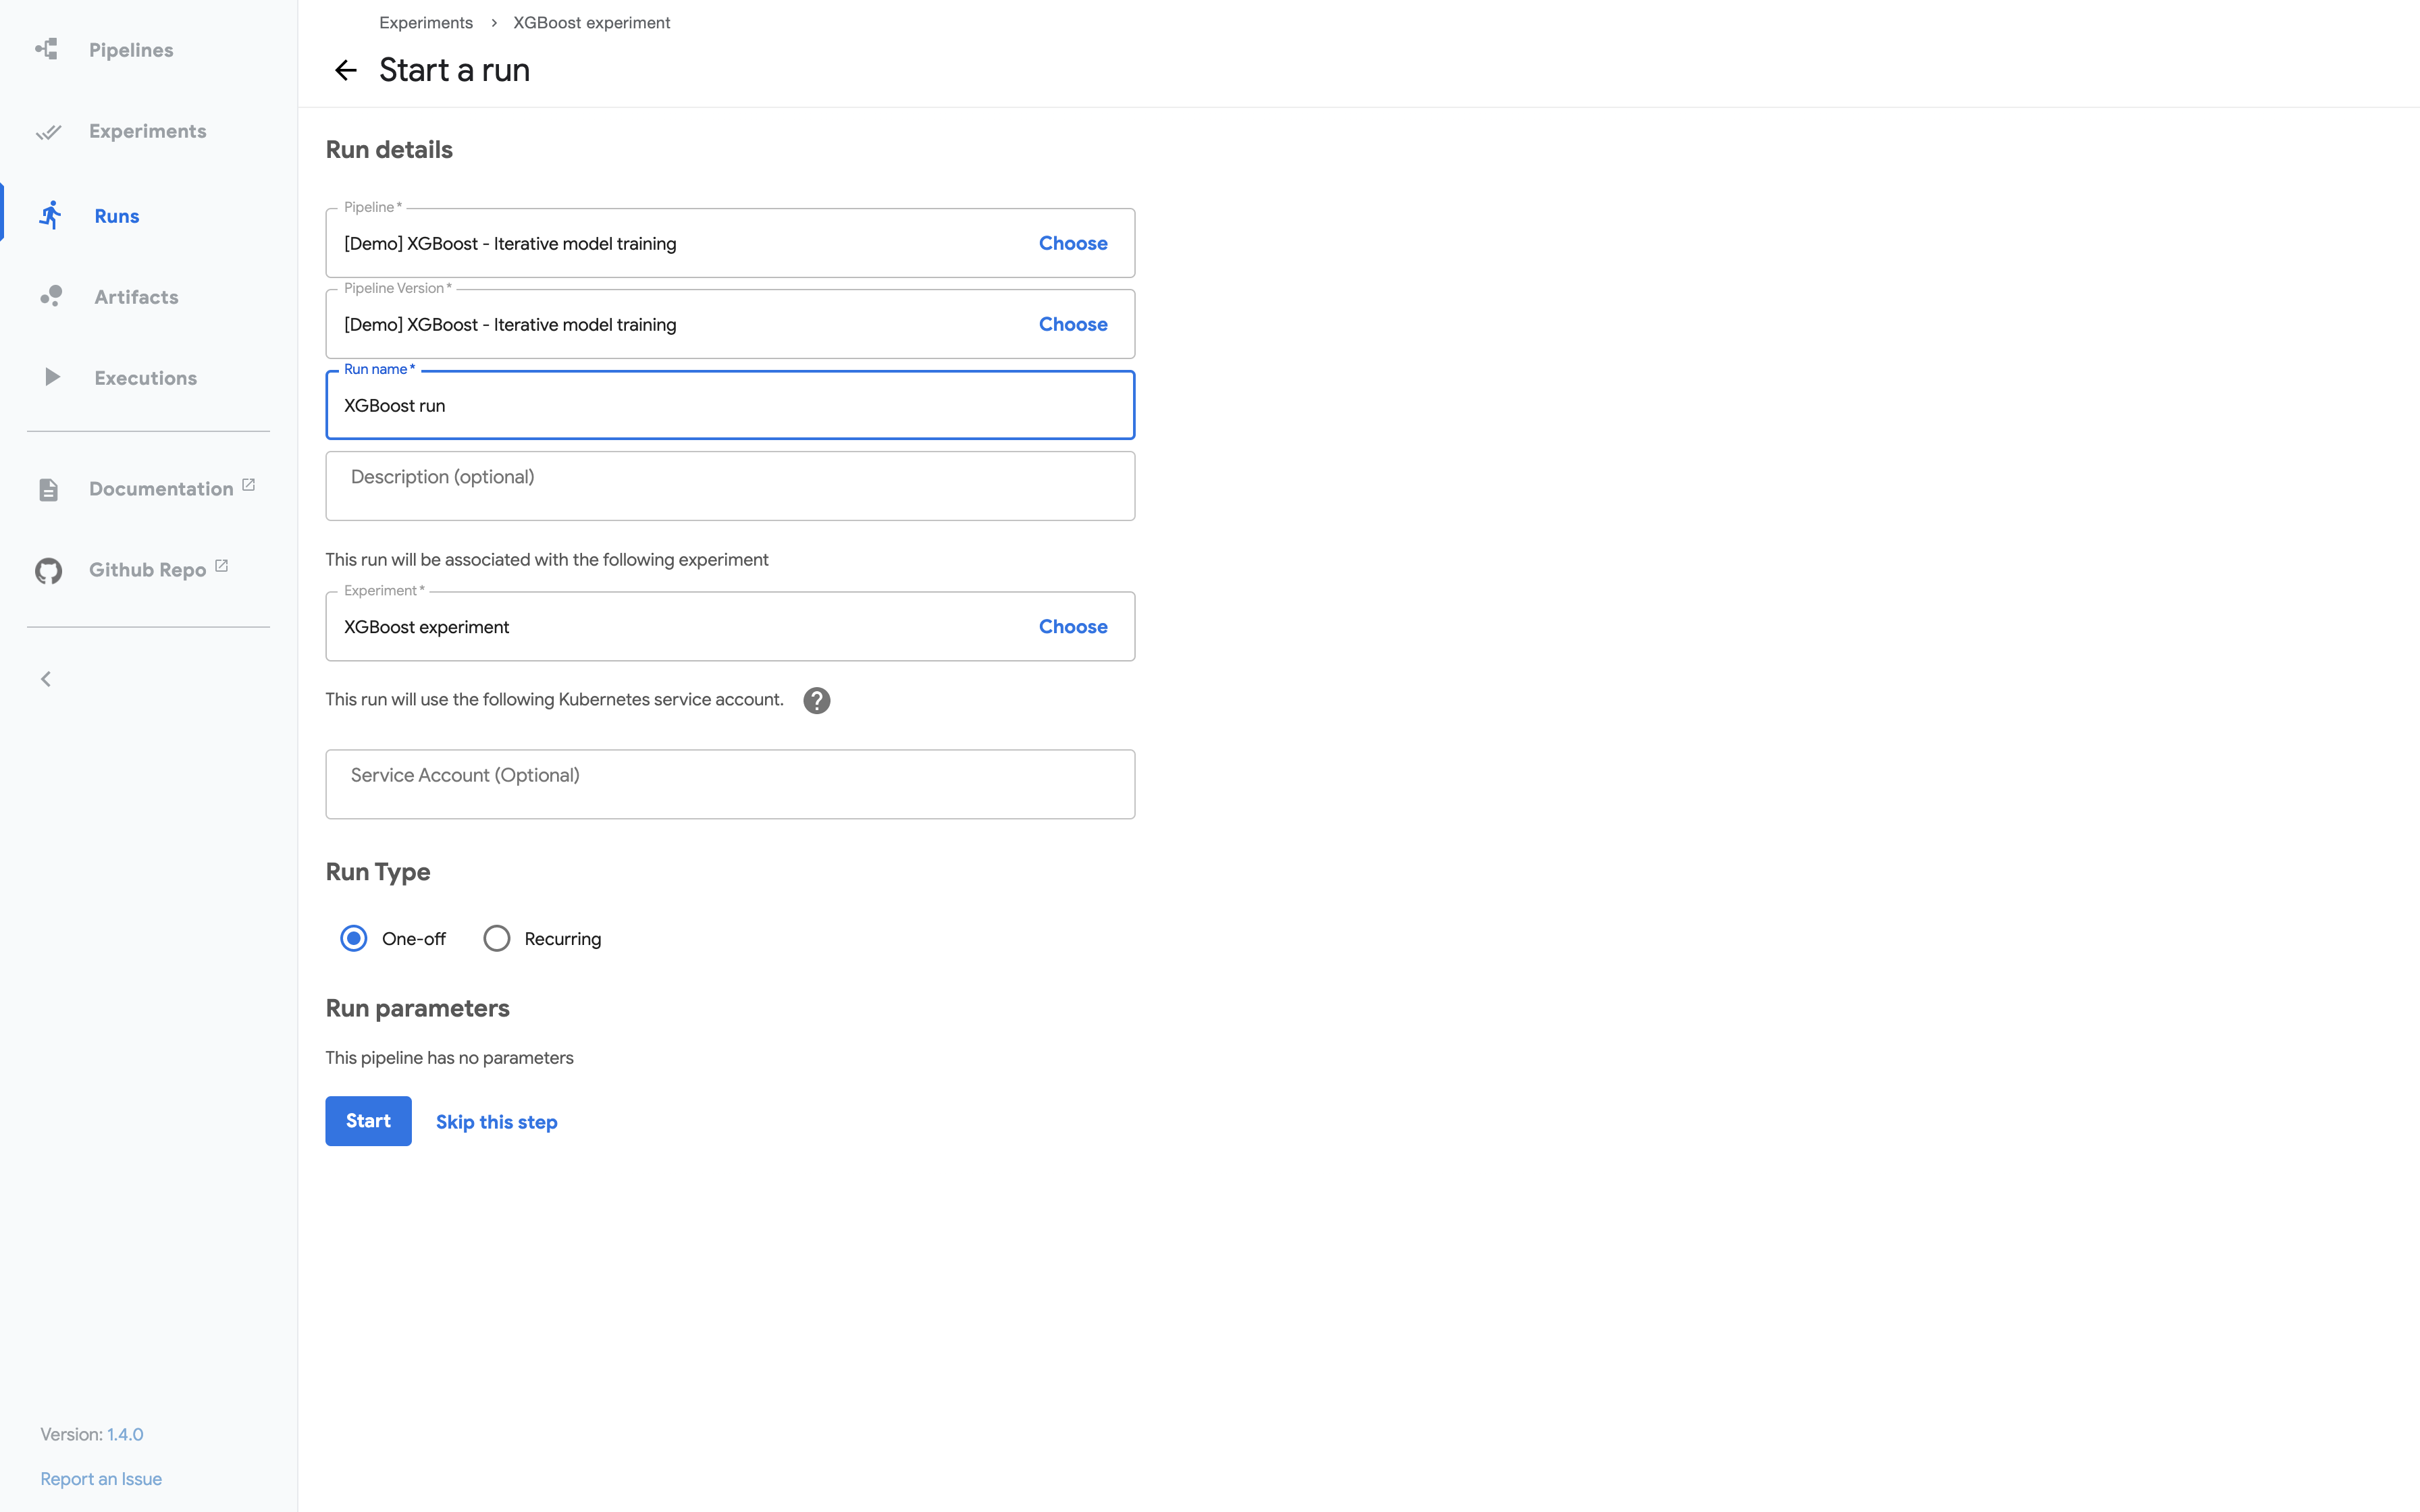
Click Start to create the run.
Click the name of the run on the experiments dashboard.
Explore the graph and other aspects of your run by clicking on the components of the graph and the other UI elements. The following screenshot shows part of the graph when the pipeline has finished running:
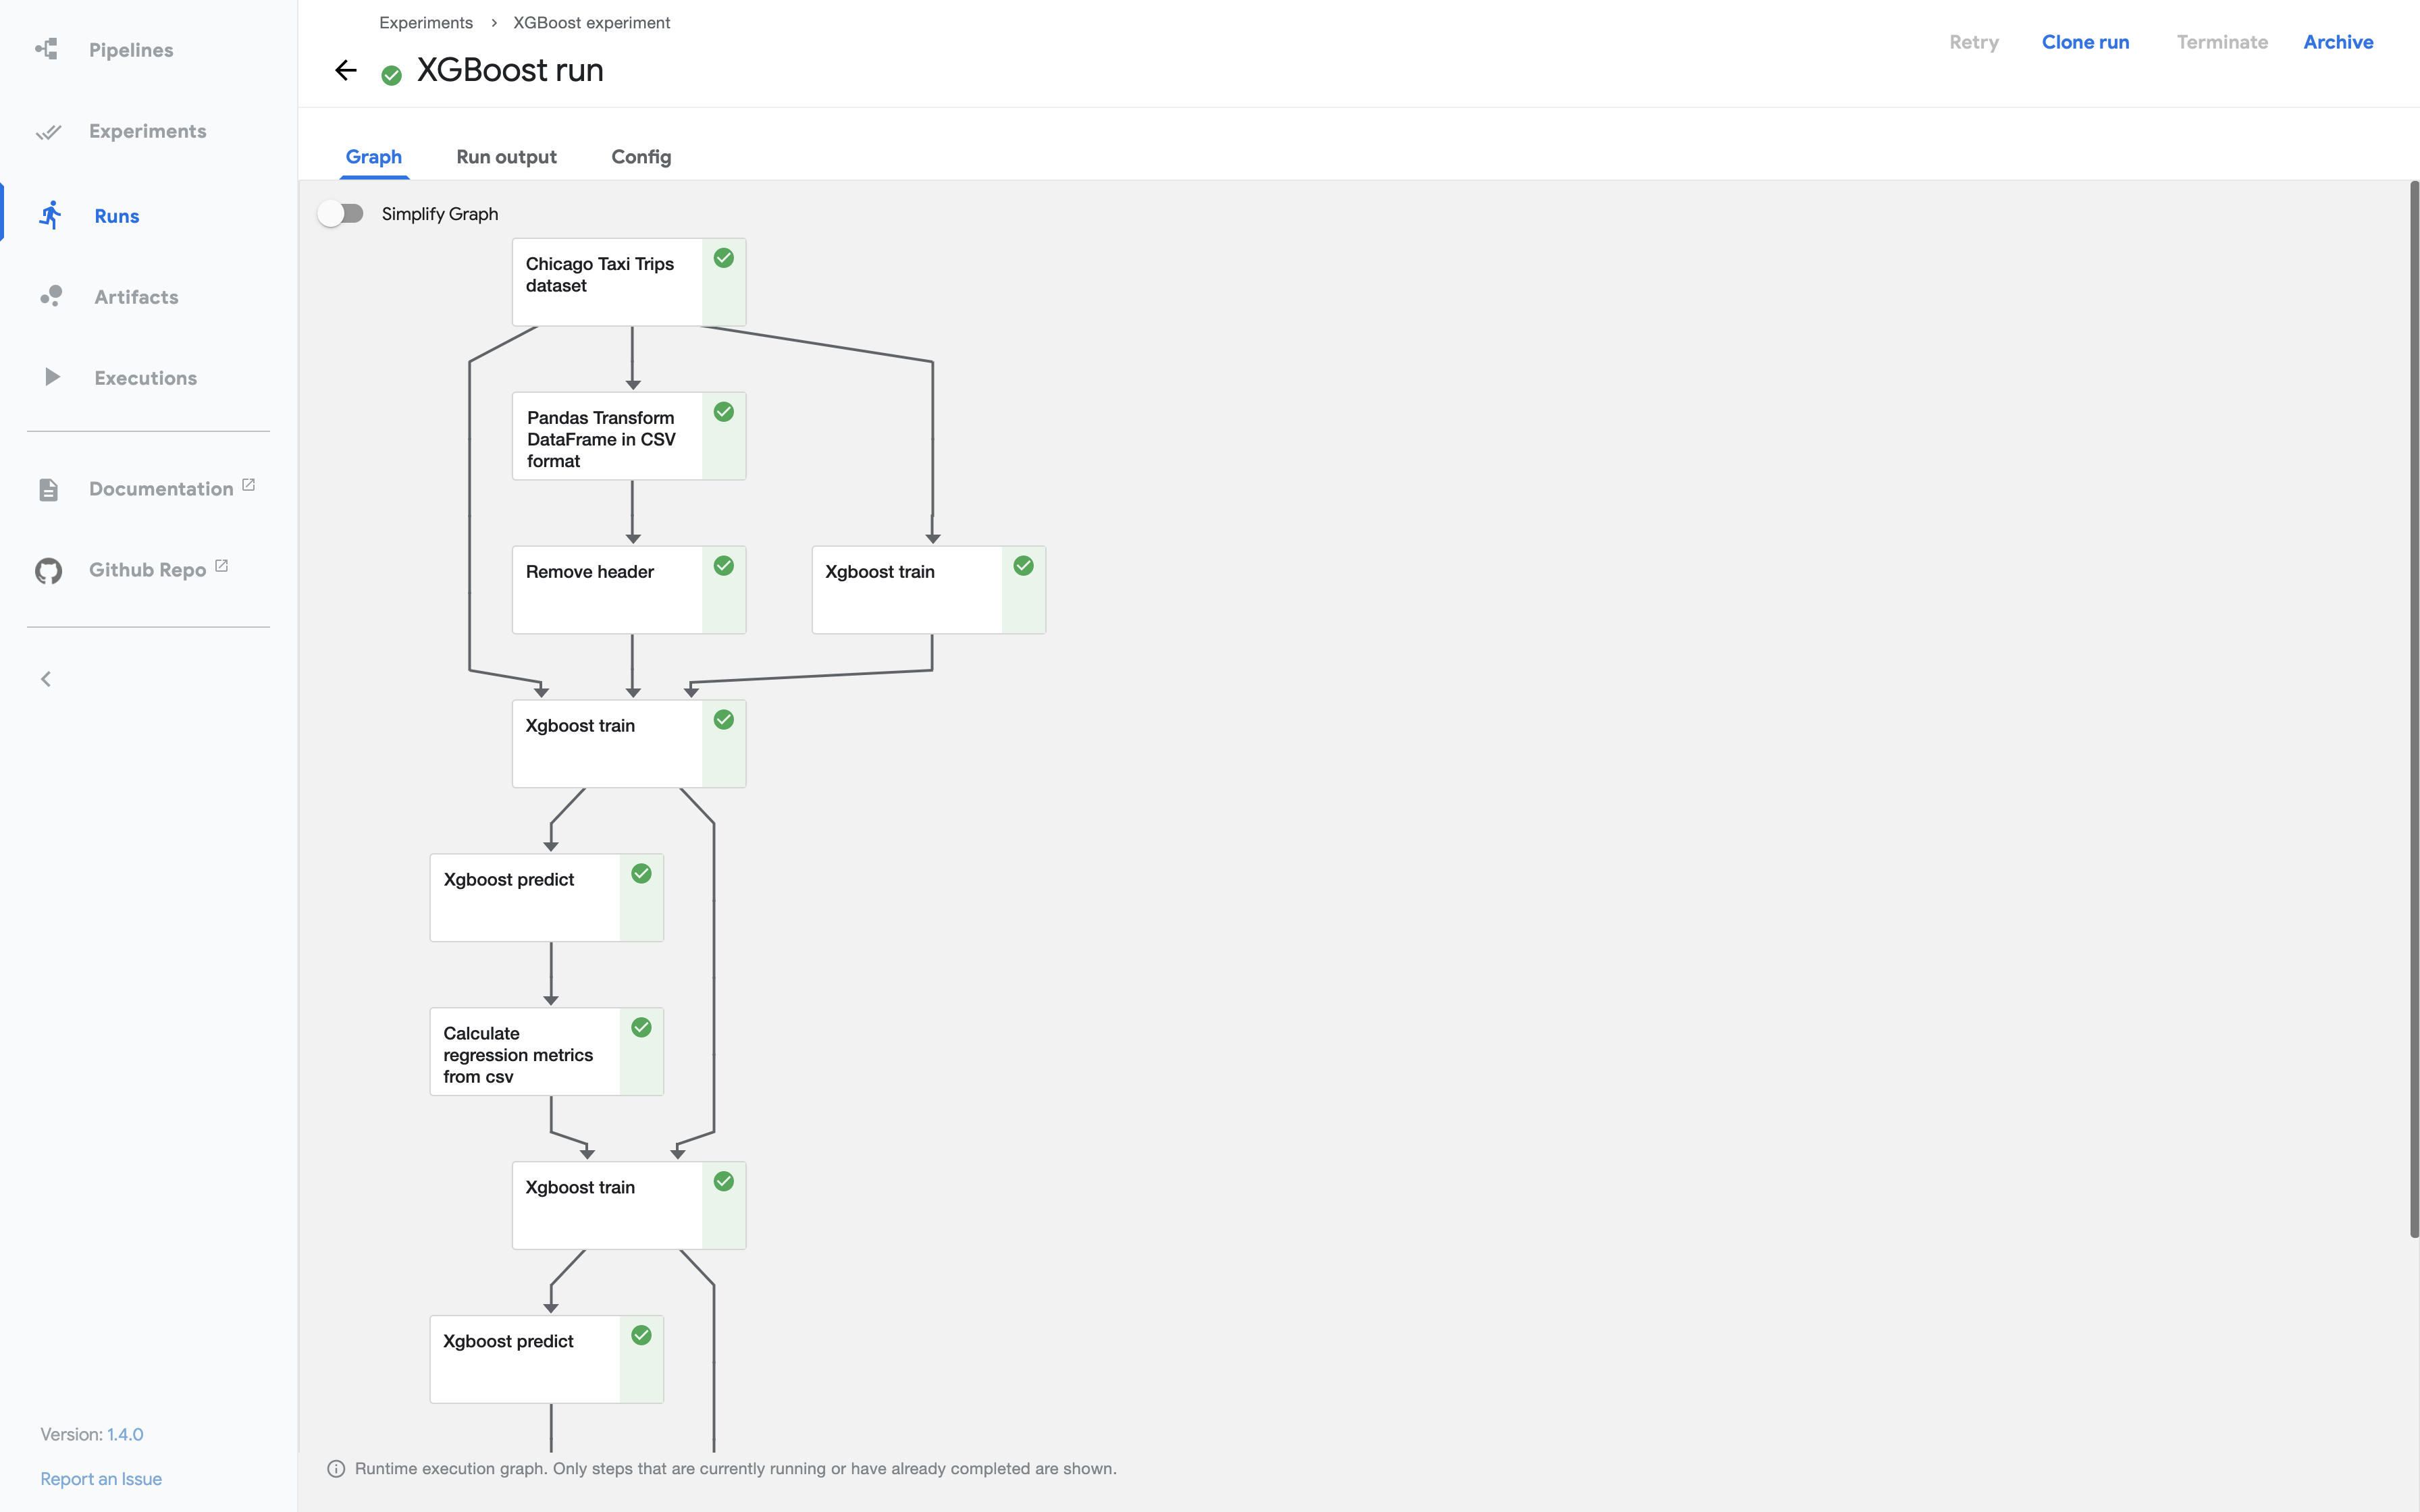
You can find the source code for the XGBoost - Iterative model training demo in the Kubeflow Pipelines repo.
Next steps
- Learn more about the important concepts in Kubeflow Pipelines.
- This page showed you how to run some of the examples supplied in the Kubeflow Pipelines UI. Next, you may want to run a pipeline from a notebook, or compile and run a sample from the code. See the guide to experimenting with the Kubeflow Pipelines samples.
- Build your own machine-learning pipelines with the Kubeflow Pipelines SDK.
Feedback
Was this page helpful?
Glad to hear it! Please tell us how we can improve.
Sorry to hear that. Please tell us how we can improve.